M&M Cellar Systems Installs a Split System Cooling Unit in a Home Wine Cellar in Los Angeles, California
A robust and dependable refrigeration system is a requirement in any wine storage facility. Each wine storage structure needs a different kind of HVAC equipment depending on variety of factors, such as the size of the room, the number of bottles stored, and the climate of the region. M&M Cellar Systems, an expert on wine cellar cooling, has a wide range of experiences in setting up all kinds of refrigeration systems. In this article, learn how they install a split system cooling unit in a residential wine cellar.
The Role of an HVAC Technician in Every Installation Project
Mario Morales, a wine cellar cooling expert and the owner/lead technician at M&M Cellars believes that the role of a technician goes beyond just installing the refrigeration equipment. A prudent technician must be able to take a look at a wine storage structure, evaluate it, and recommend the most appropriate cooling unit to install.
In a recent project in Los Angeles, Mario was tasked to assess a residential wine cellar and choose the most fitting HVAC equipment for it. After a considering all the essential factors, Mario recommended and installed a split system cooling unit.
Why We Decided to Install a Split System Cooling Unit in the Los Angeles Home Wine Cellar
Various factors are considered when picking the most appropriate refrigeration equipment for a wine storage facility. In this project in Los Angeles, our team decided to install a split system cooling unit. Here are the reasons why:
1. The Ceiling Above Did Not Have Adequate Space for Any Other Type of Refrigeration Unit
The client’s house was a two-story building and the home wine cellar was on the first floor. The pavement in between the first and second floor was narrow, which means that there was no space on the wine cellar’s ceiling for bulky installations. Any cooling unit had to be inside of the wine room.
2. The Cellar was Located Right in the Middle of the House
Since the wine room was at the middle of the client’s living space, we could not install any equipment that would operate noisily. We chose a split system cooling unit because this type of equipment has its noisy component setup outside the house. The evaporator, which operates silently, is the only component installed inside the house.

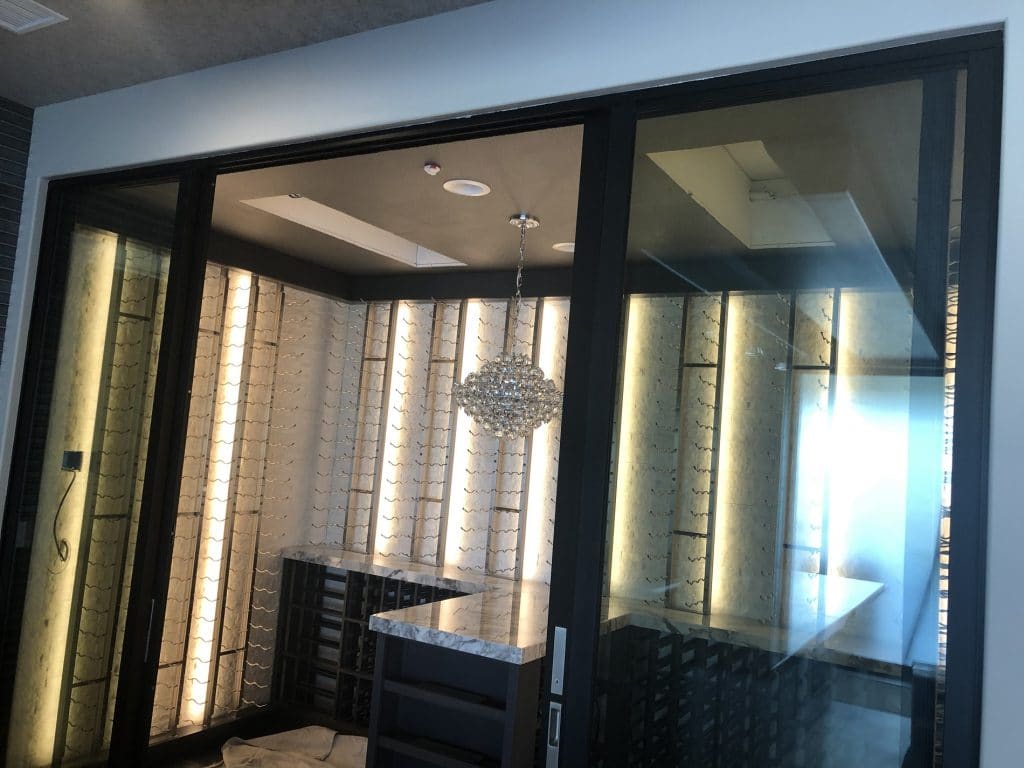
This wine cellar in the home was where the team from M&M Cellar Systems installed a split system cooling unit.
In many cases where noise is considered, a self-contained cooling system would have been an option as well. However, self-contained wine cellar refrigeration units require an adjacent room to vent hot air out. Since this Los Angeles wine cellar was situated right in the middle of the house, it did not have any room near it for venting hot air out. A self-contained unit mounted on any of its walls would have meant exhausting hot air into the client’s living space.
A Walkthrough on How to Install a Split System Cooling Unit
Mario and his team decided that the best cooling system for this Los Angeles wine cellar was a split-type configuration. More specifically, we needed to install two evaporator coils inside the cellar and one condenser unit outside the house. As soon as the type of refrigeration system to install was established, it was time to set up the equipment.
Step 1: We Prepared a Pad of Concrete Outside the House
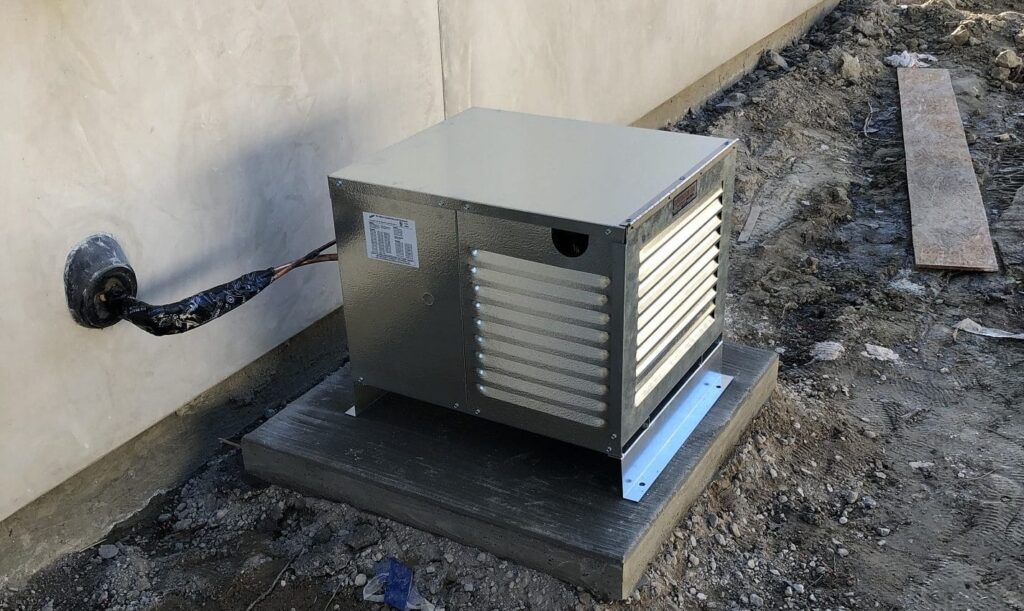
The concrete pad that was set up outside the client’s house was where the condenser will be mounted.
Step 2: Set Up the Line Set
The lines that connected the condenser unit to the evaporator coils were set up.
Step 3: Prepare the Power Source
A power source for the condenser unit has to be setup near the equipment. We installed disconnect switches right above the line set. Some cities require disconnect switches as the power source. If a disconnect switch isn’t required, an outlet will do.
Step 4: Install the Evaporator Coil of the Split System Cooling Unit
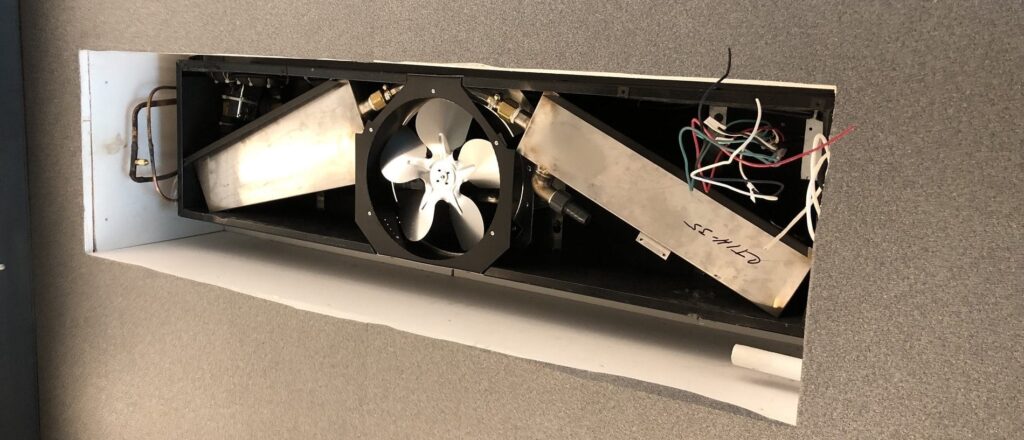
We mounted two CTI-35 evaporator coils into the recessed soffit in the wine cellar ceiling. We installed two because of the size of the wine cellar. In an ideal setting, we would have installed one huge evaporator coil that could meet the cooling needs of the cellar. However, with the limitations of space, we had to find a compromise. The most plausible solution was to install two smaller coils that could provide the same cooling capacity of one huge one.
It’s in this step that we installed an access port for pressure testing. Pressure test will be performed in the later part of the process. This will be discussed in Step 7.
Step 5: Set Up the Condensation Pump and Drain
Draining pans are located right below the evaporator coil. These collect any condensation that drips and brings them to the primary drain. Generally, wine cellar refrigeration units come with a mini condensate pump that is included by their manufacturers. We didn’t use this pump. Instead, we replaced it with a gravity drain. If a project allows the use of a gravity drain, we would always use one. Otherwise, we can use either the mini condensate pump or install a standard condensate pump.
Step 6: Configure the Stainless Steel Enclosure
In between the concrete pad and the condensing unit, we mounted a base that would be the platform for the stainless steel enclosure. The enclosure is soldered to make sure that the refrigeration equipment is sealed and protected.
Step 7: Pressure Test the Split System Cooling Unit
It is the standard operating procedure of any HVAC installation project to perform a pressure test. This test makes sure that there are no leaks in the system. We pressured this split type cooling system with 200 psi of nitrogen.
The access port that we installed at the evaporator coil (see Step 4) was placed so that we could compare the pressure at the evaporator located inside versus the pressure at the condenser outside. The access port was placed for convenience and accuracy of pressure reading because without it, we would have to go back and forth the evaporator coil and the condenser unit. In most cases, if a technician has to move from the evaporator inside to the condenser outside, they’ll notice a 1 to 3 lbs. drop in pressure, which then leads to inaccurate reading.
Hire an Expert to Install Your Split System Cooling Unit
There are so many technicalities in installing a wine cellar refrigeration equipment. It is safer and wiser to entrust the installation process to an experienced HVAC technician. M&M Cellar Systems can help you install your split system cooling unit. Call them today at (323) 578-3330 and see how they can take care of your wine cellar cooling needs!


